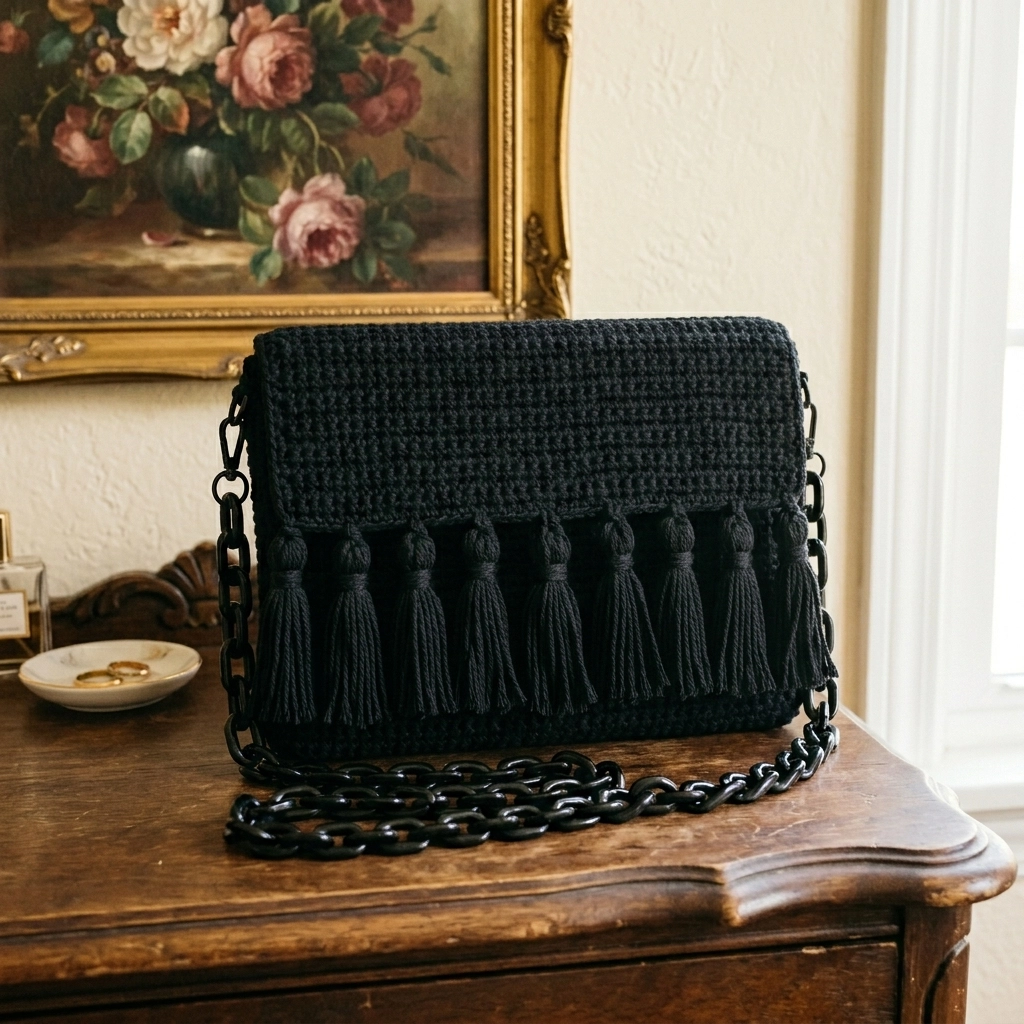
This elegant black tassel fringe clutch crossbody is the kind of project that makes people ask, “Wait, you *made* that?” The answer is yes. And soon you will too.
I designed this crochet pattern to look like something you would find in a boutique. The textured stitch work creates a structured, sophisticated body. The row of chunky tassels adds movement and drama. And that black acrylic chain strap takes the whole piece from handmade to high-end.
If you can work basic stitches in rows and follow a simple repeat, you can absolutely make this bag. The construction is straightforward. You are crocheting flat panels, seaming them together, adding tassels, and attaching hardware. No complicated shaping. No confusing increases. Just satisfying, rhythmic stitch work that builds into something stunning.
Let me walk you through everything you need to recreate this crochet clutch crossbody pattern from scratch.
Why This Tassel Clutch Bag Works So Well
Before we dive into the pattern, let me tell you why I love this design so much.
The body uses a textured stitch pattern that creates subtle horizontal ridges. This gives the bag structure and visual interest without being fussy. It photographs beautifully and feels substantial in your hands.
The tassel fringe is the star of the show. Each tassel is wrapped and knotted to create that rounded bobble shape at the top. They hang at a uniform length and sway when you move. Very chic.
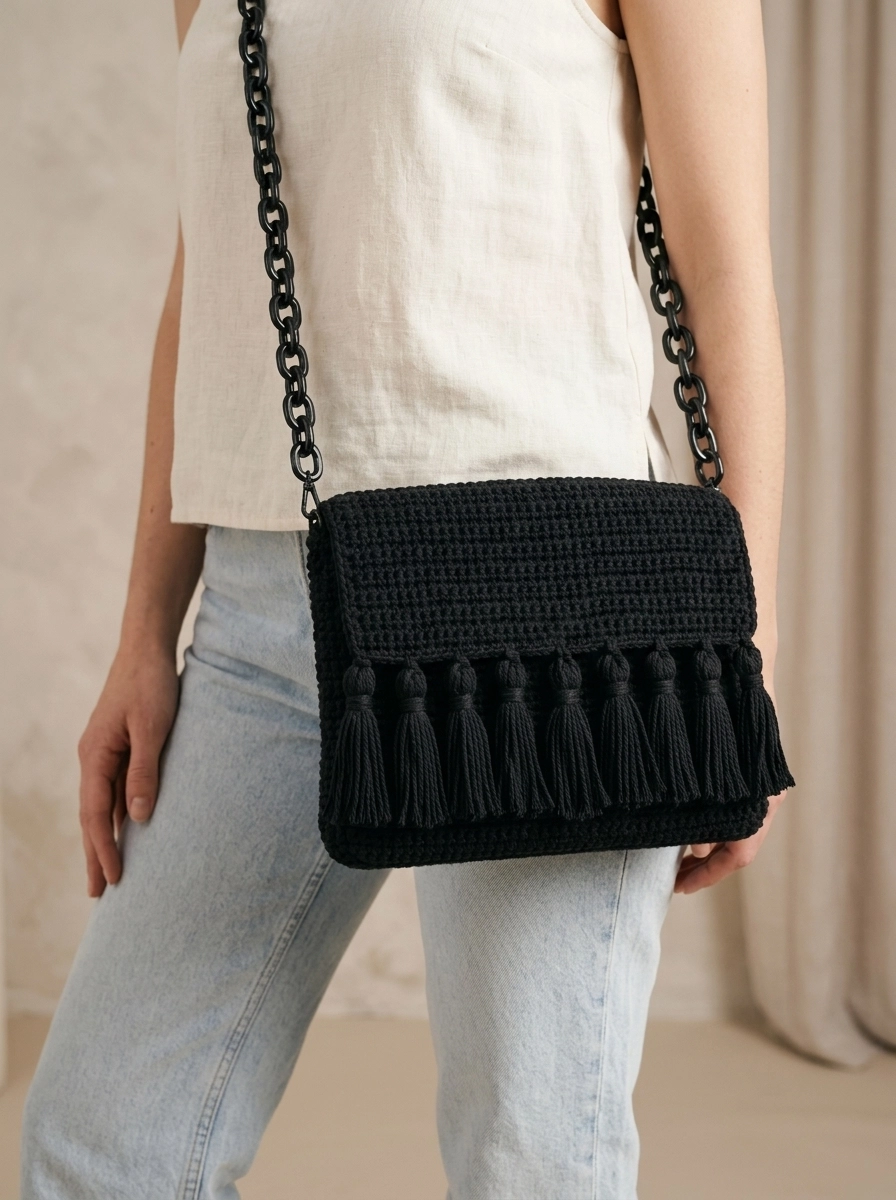
The black acrylic chain strap is a game changer. You can find these online or at craft supply stores. They come in various lengths and link sizes. The chunky oval links complement the handmade texture of the crochet perfectly.
And because everything is black, this bag goes with literally anything. Date night. Brunch. Weddings. Work events. It is endlessly versatile.
Skill Level
Confident beginner to intermediate.
You should be comfortable with:
- Working in rows
- Turning chains
- Keeping consistent stitch counts
- Basic seaming
If you have made a scarf or dishcloth successfully, you can handle this project.
Finished Dimensions
- Width: Approximately 9 inches (23 cm)
- Height: Approximately 6 inches (15 cm) not including tassels
- Tassel length: Approximately 3 inches (7.5 cm)
- Strap drop: Adjustable based on chain length (shown approximately 22 inches)
Materials Needed
Here is everything you need to make this crochet tassel fringe clutch crossbody bag.
Yarn
- Weight: Light worsted or DK weight (category 3)
- Fiber: 100% cotton or cotton blend recommended for structure
- Color: Black
- Quantity: Approximately 200 yards (183 meters)
Cotton yarn gives this bag the body and drape you see in the photos. Acrylic can work but may stretch over time. Mercerized cotton is especially nice because it has a slight sheen.
Hook
- Size: 4.0 mm (US G/6)
Adjust if needed to achieve gauge. A smaller hook creates a tighter, sturdier fabric for bags.
Notions
- Yarn needle for weaving and seaming
- Scissors
- Stitch markers (optional but helpful)
- Black acrylic chain strap (approximately 44 to 48 inches for crossbody length)
- 2 jump rings or lobster clasps for attaching chain (if not built into chain)
- Small piece of cardboard (approximately 3 inches) for making tassels
- Fabric lining and sewing supplies (optional)
- Magnetic snap closure (optional)
Gauge
18 stitches and 16 rows = 4 inches (10 cm) in the main stitch pattern.
Gauge matters here because you want the bag to hold its shape. If your fabric feels loose or floppy, go down a hook size.
Abbreviations and Stitch Definitions
Let me define every stitch and term before we begin. No confusion allowed.
- ch = chain: Wrap yarn over hook, pull through loop on hook. The foundation for most crochet projects.
- sl st = slip stitch: Insert hook, yarn over, pull through both the stitch and the loop on your hook in one motion. Used for joining and invisible movement.
- sc = single crochet: Insert hook into stitch, yarn over, pull up a loop (2 loops on hook), yarn over, pull through both loops. A short, tight stitch.
- hdc = half double crochet: Yarn over, insert hook into stitch, yarn over, pull up a loop (3 loops on hook), yarn over, pull through all 3 loops. Slightly taller than sc with nice texture.
- BLO = back loop only: Instead of inserting your hook under both loops at the top of the stitch, insert under only the back loop (the one farther from you). This creates ribbed texture.
- st(s) = stitch(es)
- sk = skip
- rep = repeat
Special Technique: Back Loop Only (BLO) Texture
The main body of this bag uses half double crochet worked in the back loop only. This creates those beautiful horizontal ridges you see in the photos.
When you look at the top of any stitch, you see two loops that look like a little V. The back loop is the one that sits farther away from you as you work. By only crocheting into that loop, the front loop creates a visible ridge on the surface.
It sounds fancy but it is actually easier than regular crochet once you get used to it. Your hook just goes in a slightly different spot.
Pattern Instructions
This bag is constructed in three main pieces: the front panel, the back panel, and the flap. All three are worked flat in rows and then seamed together.
Front Panel
Ch 41.
Row 1: Hdc in 3rd ch from hook and in each ch across. Turn. (39 hdc)
The turning chain counts as the first hdc throughout this pattern.
Row 2: Ch 2 (counts as hdc), hdc in BLO of each st across. Turn. (39 hdc)
Rows 3 through 24: Repeat Row 2. (39 hdc per row)
After Row 24, you should have a rectangle measuring approximately 9 inches wide by 6 inches tall. Fasten off and weave in ends.
Back Panel
Work exactly the same as the Front Panel.
Ch 41.
Row 1: Hdc in 3rd ch from hook and in each ch across. Turn. (39 hdc)
Rows 2 through 24: Ch 2, hdc in BLO of each st across. Turn. (39 hdc)
Fasten off. Weave in ends.
Flap
The flap is slightly shorter because it only needs to fold over and cover part of the front.
Ch 41.
Row 1: Hdc in 3rd ch from hook and in each ch across. Turn. (39 hdc)
Rows 2 through 16: Ch 2, hdc in BLO of each st across. Turn. (39 hdc)
Fasten off. Leave a long tail for seaming if you prefer.
Assembly Instructions
Now we put the pieces together. Take your time here. Neat seaming makes a big difference in the finished look.
Step 1: Join Front and Back Panels
Place the front and back panels together with wrong sides facing each other.
Using your yarn needle and a length of black yarn, whip stitch along three sides: the bottom edge and both side edges. Leave the top edge open.
To whip stitch: Insert needle through the edge stitch of both layers from back to front. Bring needle over the edge and insert again through the next stitch pair. Keep stitches even and snug.
Step 2: Attach the Flap
Position the flap along the top back edge of the bag, right sides together. The flap will fold forward over the front of the bag.
Whip stitch the flap to the back panel along the top edge only.
Fold the flap forward. It should cover most of the front panel and display the ridged texture on the outside.
Step 3: Create Attachment Points for Chain
On each side of the bag near the top corners, create small reinforced loops for attaching your chain strap.
You can do this by crocheting a small chain of 8 to 10 stitches, joining it into a loop, and sewing it securely to the inside corner. Or you can sew a metal D-ring to each corner if you prefer.
Make sure these attachment points are very secure. They will hold the weight of the bag.
How to Make the Tassels
The tassels are what make this bag so special. You will need 9 tassels for the flap.
Step 1: Wrap the Yarn
Cut a piece of cardboard approximately 3 inches tall.
Wrap your yarn around the cardboard 25 to 30 times. More wraps create fuller tassels.
Step 2: Tie the Top
Cut a 10 inch piece of yarn. Slide it under all the wrapped strands at the top of the cardboard. Tie a tight double knot.
Step 3: Cut the Bottom
Carefully slide the wrapped yarn off the cardboard. Cut through all the loops at the bottom.
Step 4: Create the Wrapped Head
Hold the tassel by the tied top. About half an inch down, wrap another piece of yarn tightly around all the strands several times (8 to 10 wraps). Tie securely and use your yarn needle to hide the ends inside the tassel head.
This creates that distinctive rounded bobble shape at the top of each tassel.
Step 5: Trim Evenly
Lay the tassel flat and trim the ends so they are all the same length. Approximately 2.5 to 3 inches looks balanced.
Repeat to make 9 tassels total.
Attaching the Tassels
Space the tassels evenly along the bottom edge of the flap.
Using your yarn needle, thread the long tie at the top of each tassel through the edge stitches of the flap. Pull through to the back and knot securely. Weave in the ends inside the flap so they are invisible.
The tassels should hang freely and move when the bag moves.
Attaching the Chain Strap
Thread your acrylic chain strap through the loops or D-rings you created on each side of the bag.
If your chain has open end links, you can simply hook them through. If not, use jump rings or small lobster clasps to connect the chain to your attachment points.
Test the length by holding the bag at your hip. Adjust as needed. Most crossbody straps are between 44 and 52 inches total for comfortable wear.
Optional Finishing Touches
Fabric Lining
For a truly polished interior, cut a piece of black cotton fabric slightly smaller than the interior dimensions. Fold the edges under and hand stitch to the inside of the bag. This protects your belongings and gives the bag more structure.
Magnetic Snap Closure
Sew a magnetic snap to the inside center of the flap and the corresponding spot on the front panel. This keeps the bag securely closed.
Pattern Notes and Tips
- Block your pieces before seaming if the edges are curling. Wet blocking or steam blocking works well with cotton yarn.
- Count your stitches every few rows. It is easy to accidentally skip the last stitch when working in BLO.
- Use stitch markers at the beginning and end of rows if you tend to lose stitches.
- Make a test tassel first to get the fullness and length you want before making all nine.
Styling Your Crochet Tassel Clutch Crossbody
This bag is incredibly versatile. Wear it as a crossbody for hands-free convenience. Tuck the chain inside and carry it as a clutch for evening events. The black color works with everything from jeans to cocktail dresses.
The textured crochet and dramatic tassels make it a conversation starter. People will not believe you made it yourself.
You Did It
And that is the complete crochet tassel fringe clutch crossbody pattern. Every stitch, every step, every detail you need to create this gorgeous bag from scratch.
I hope you love making this as much as I loved designing it. There is something so satisfying about crocheting accessories that look this polished.
When you finish yours, I would absolutely love to see it. Tag me on Instagram or share in my Facebook group. Seeing your versions is genuinely the best part of sharing patterns.
Thank you for trusting me with your next project. Now go grab that black yarn and start stitching. You have got this.
Happy crocheting.