I absolutely love how this bag turned out, and I cannot wait to walk you through every single step. This olive round crossbody bag is the kind of project that looks incredibly impressive but is honestly so achievable. If you can crochet in the round and know your basic stitches, you can make this gorgeous accessory.
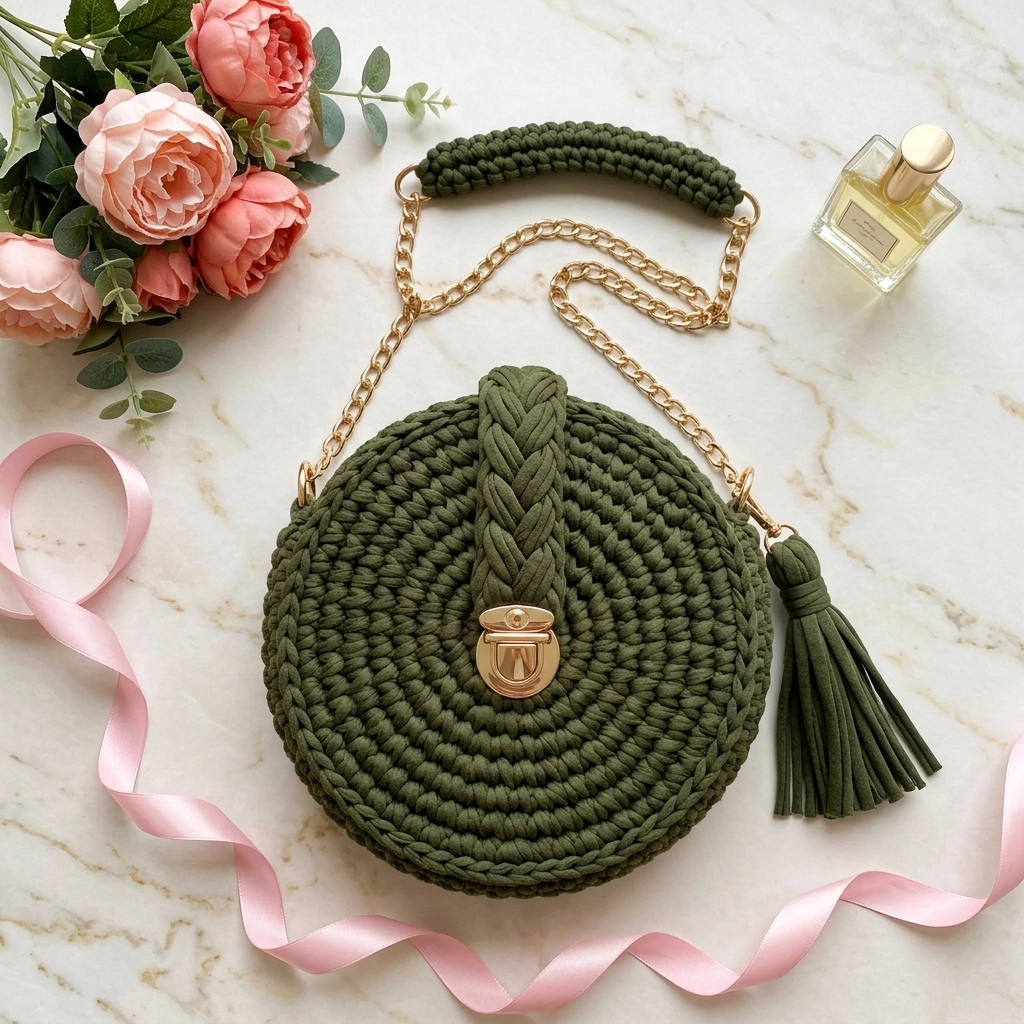
The chunky texture, that beautiful braided flap detail, the matching tassel, and those gold hardware accents all come together to create something that looks straight out of a boutique. But here is the best part. You are going to make it yourself, and it will cost a fraction of what you would pay retail.
This crochet pattern works up quickly because we are using t-shirt yarn, which is thick, soft, and forgiving. Even if your tension is not perfect, the finished bag will look polished. I would call this an intermediate beginner project. If you have made a few hats or simple bags before, you are absolutely ready for this.
Let me show you exactly how to create your own stunning crossbody bag from start to finish.
Why You Will Love This Crochet Bag Pattern
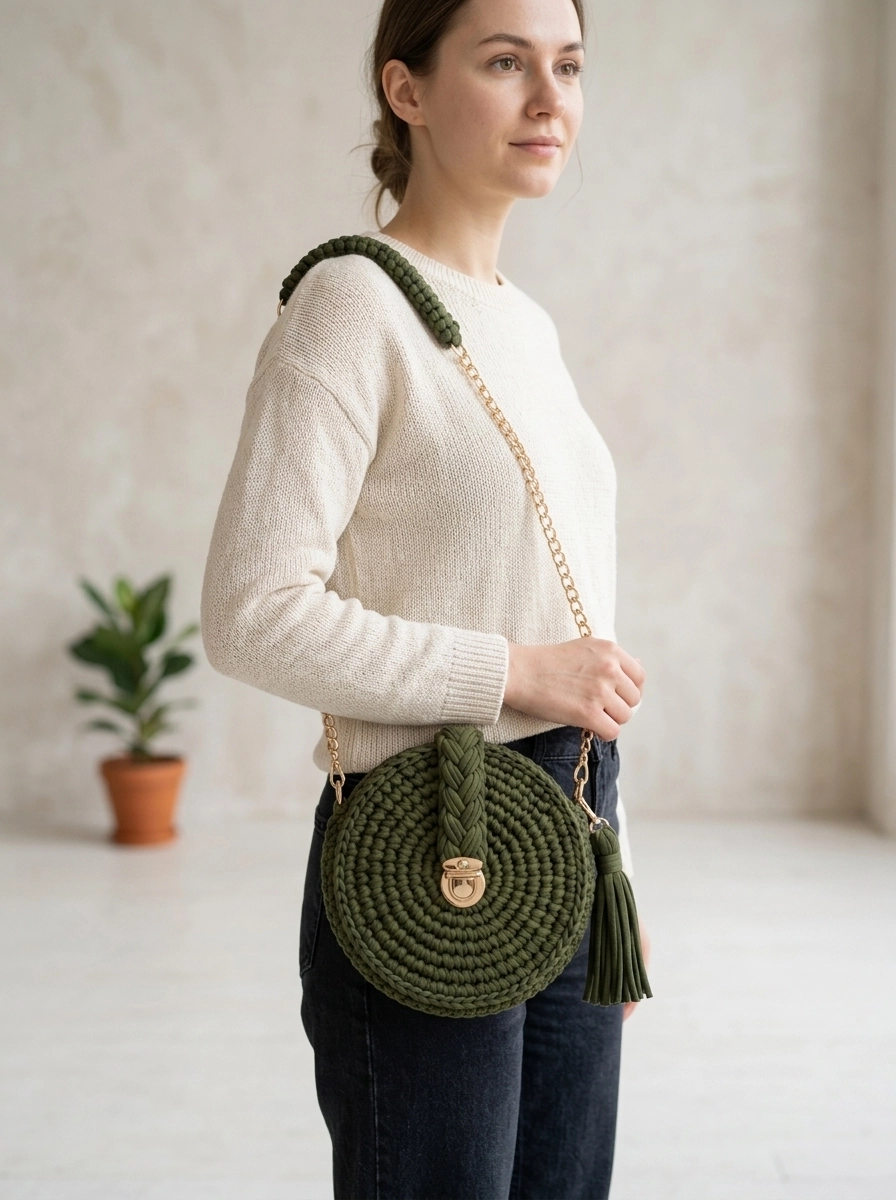
There is something so satisfying about making your own accessories. This round crossbody bag crochet pattern gives you a functional, stylish piece you will actually use every day.
The circular shape is trendy and timeless at the same time. It holds more than you might think. Your phone, wallet, keys, lip balm, and a few extras fit perfectly inside. The flat profile keeps it sleek against your body, so it does not bulk up your outfit.
Because we are working with t-shirt yarn, this bag has wonderful structure without any stiffening or interfacing. The material naturally holds its shape while staying soft to the touch. Plus, t-shirt yarn comes in every color imaginable, so you can customize this to match your wardrobe perfectly.
Materials Needed for Your Crochet Crossbody Bag
Before we dive into the step by step instructions, let me list everything you need. Gathering your supplies first makes the whole process smoother.
Yarn:
- 2 skeins of t-shirt yarn (also called trapillo or ribbon yarn), approximately 130 yards total
- Color shown: olive green
- Any brand works beautifully. Look for consistent width throughout the skein.
Hook:
- Size 9mm or 10mm crochet hook (US N/P or larger)
- T-shirt yarn needs a big hook. If your stitches feel too tight, go up a size.
Hardware:
- 1 push lock clasp (also called a turn lock or tuck lock), gold finish
- 2 D-rings, approximately 15mm to 20mm, gold finish
- 1 purse chain strap, 47 to 51 inches long, gold finish
- Optional: 2 small jump rings if your chain does not have lobster clasps
Tools:
- Tapestry needle with large eye
- Scissors
- Stitch marker
- Fabric glue or hot glue gun
- Small screwdriver (for push lock installation)
For the Tassel:
- Small piece of cardboard, about 4 inches tall
- Leftover t-shirt yarn
Stitch Abbreviations and Definitions
Let me break down every stitch you will use in this crochet tutorial. I define each one so there is no confusion as you work.
Ch = Chain: Wrap yarn over hook, pull through loop on hook. This creates a foundation or adds height.
Sl st = Slip stitch: Insert hook, yarn over, pull through both the stitch and the loop on your hook in one motion. Used to join rounds invisibly.
Sc = Single crochet: Insert hook into stitch, yarn over, pull up a loop (2 loops on hook), yarn over, pull through both loops. This creates a short, dense stitch.
Inc = Increase: Work 2 single crochet stitches into the same stitch. This adds one stitch to your count.
MR = Magic ring (also called magic circle or adjustable ring): A technique that creates a closed center with no hole. If you prefer, you can chain 2 and work your first round into the second chain from hook instead.
Gauge Information
Gauge matters less with bags than with garments, but here is what to aim for.
Working in single crochet with t-shirt yarn and a 9mm hook: 8 stitches and 8 rows = 4 inches
Your finished bag circles should measure approximately 7 to 8 inches in diameter. If yours is coming out much smaller, try a larger hook. If it is much bigger and floppy, go down a hook size.
How to Crochet the Round Crossbody Bag
This bag is constructed from two identical circles joined together, with a braided flap added on top. We work everything in continuous spiral rounds, which means you do not join at the end of each round. Use a stitch marker to track your first stitch.
Front and Back Circles (Make 2)
Round 1: Create a magic ring. Work 6 sc into the ring. Pull the tail to close. Place stitch marker in the first sc. (6 sts)
Round 2: Inc in each st around. (12 sts)
Round 3: *Sc in next st, inc in next st* repeat around. (18 sts)
Round 4: *Sc in next 2 sts, inc in next st* repeat around. (24 sts)
Round 5: *Sc in next 3 sts, inc in next st* repeat around. (30 sts)
Round 6: *Sc in next 4 sts, inc in next st* repeat around. (36 sts)
Round 7: *Sc in next 5 sts, inc in next st* repeat around. (42 sts)
Round 8: *Sc in next 6 sts, inc in next st* repeat around. (48 sts)
Round 9: *Sc in next 7 sts, inc in next st* repeat around. (54 sts)
Round 10: *Sc in next 8 sts, inc in next st* repeat around. (60 sts)
Slip stitch into next stitch to finish. Fasten off, leaving a long tail on the back circle for sewing. Weave in the tail on the front circle.
Your circles should lay flat without cupping or ruffling. If they cup inward, your tension is too tight. If they ruffle at the edges, your tension might be loose or you may have accidentally added extra increases.
Joining the Front and Back
Hold both circles with wrong sides facing each other (the neater sides should face outward). Using the long tail from the back circle and your tapestry needle, whip stitch around the edges to join.
Important: Leave a 3 to 4 inch opening at the top for installing the push lock clasp later. Do not close it completely yet.
Take your time with this step. Neat, even stitches here make a big difference in the finished look. Match stitch to stitch as closely as possible.
Creating the Braided Flap Detail
This decorative element sits on the front of your bag, above the clasp. It is made from three strands of t-shirt yarn braided together.
Step 1: Cut 3 pieces of t-shirt yarn, each about 16 inches long.
Step 2: Hold all three pieces together. Tie a knot about 2 inches from one end.
Step 3: Braid the three strands traditionally. Right over middle, left over middle, repeat until you have about 5 to 6 inches of braid.
Step 4: Tie a knot at the other end to secure. Trim the tails so they are even, leaving about 2 inches on each end.
Step 5: Curve the braid into a gentle arch shape. Using your tapestry needle and matching yarn, stitch the braid onto the front of your bag, centered above where the clasp will go. Tuck the knotted ends underneath so they are hidden.
The braid adds such a lovely texture and gives the bag that designer feel. Do not skip this part.
Installing the Push Lock Clasp
This step requires a bit of precision, but do not be intimidated. Go slowly and measure twice.
Step 1: Position the decorative front plate of your clasp centered on the front circle, about 1.5 inches down from the top edge and below your braid.
Step 2: Mark where the prongs need to poke through the crocheted fabric. Use your scissors or a small awl to carefully create small holes.
Step 3: Push the prongs through from the front. On the inside, place the backing plate over the prongs and bend them flat with pliers or fold them down to secure.
Step 4: For the back piece of the clasp (the part that the lock hooks into), position it on the back circle directly behind the front plate. Install the same way.
Test that the clasp opens and closes smoothly. If it feels off, adjust the positioning before fully securing.
Now you can finish sewing the opening closed with your tapestry needle and remaining yarn tail.
Adding D-Rings for the Strap
You need attachment points for your chain strap. D-rings work perfectly for this.
Crochet Tab (Make 2):
Row 1: Ch 6. Sc in 2nd ch from hook and in each ch across. (5 sts)
Rows 2 through 4: Ch 1, turn. Sc in each st across. (5 sts)
Fasten off, leaving a long tail for sewing.
Thread one D-ring onto each tab. Fold the tab in half over the ring. Sew the tab securely to the side of your bag, positioned at the top edge. Repeat on the other side.
These tabs take a lot of stress when you carry the bag, so reinforce them well. A few extra stitches never hurt.
Creating the Crochet Covered Strap Handle
See that beautiful textured portion in the center of the chain strap? That is a crocheted tube that makes the bag more comfortable on your shoulder.
Row 1: Ch 31. Sc in 2nd ch from hook and in each ch across. (30 sts)
Rows 2 through 6: Ch 1, turn. Sc in each st across. (30 sts)
Fasten off, leaving long tails on both ends.
This creates a rectangular piece. Wrap it around the center portion of your chain strap, bringing the long edges together. Use your tapestry needle to whip stitch the edges closed, encasing the chain inside.
The covered section should be about 5 to 6 inches long. Attach your chain to the D-rings on either side of the bag.
How to Make the Tassel
The tassel is such a sweet finishing touch. Here is the easiest method.
Step 1: Wrap t-shirt yarn around a 4 inch piece of cardboard about 8 to 10 times.
Step 2: Slide a separate piece of yarn under the top loops and tie tightly. This becomes your hanging loop.
Step 3: Cut through the bottom loops.
Step 4: Wrap another piece of yarn around the tassel about half an inch from the top to create the “head” of the tassel. Knot securely and tuck the ends inside.
Step 5: Trim the bottom of the tassel so all strands are even.
Attach your tassel to one of the D-rings using the hanging loop. It should dangle freely and add lovely movement to your bag.
Tips for Success with This Crochet Pattern
Consistent tension is key. T-shirt yarn can be tricky because the width varies. Try to pull from the center of the skein for more consistency.
Block your circles if needed. If they are not laying perfectly flat, steam blocking helps. Hold a steamer or iron a few inches above the fabric and let the moisture relax the stitches.
Choose quality hardware. Cheap chain straps can tarnish or break. Invest in decent findings and your bag will last for years.
Customize the size. Want a bigger bag? Keep increasing in the established pattern (add one more sc between increases each round) until you reach your desired diameter.
Skill Level and Time Estimate
I would rate this crochet bag pattern as intermediate beginner. You should be comfortable with single crochet, increasing, working in the round, and basic sewing techniques.
Time to complete: approximately 3 to 5 hours depending on your pace. The crocheting goes quickly. Most of the time is spent on assembly and finishing details.
Final Thoughts on Your New Favorite Accessory
You did it. You now have a stunning olive round crossbody bag that you made with your own two hands. Every time someone asks where you got it, you get to say you made it yourself. That feeling never gets old.
This crochet crossbody bag pattern is one I come back to again and again in different colors. It makes an incredible gift too. Birthdays, holidays, just because. Everyone loves a handmade bag.
Thank you so much for choosing to make this project. I truly appreciate you trusting me with your crafting time. If you make this bag, I would absolutely love to see it. Tag me on Instagram or share in my Facebook group. Seeing your creations is the best part of my day.
Happy crocheting, friend. You have got this.